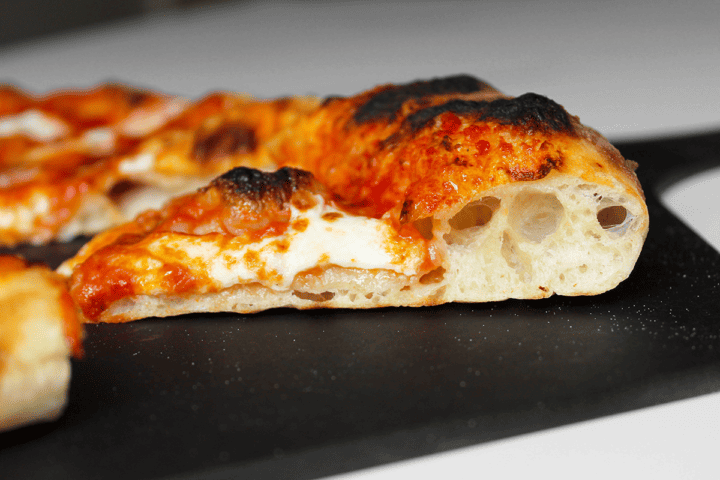
Based on Jim Lahey's No-Knead Pizza Dough, this overnight pizza dough recipe is super easy to make and creates a crust that's crispy, bubbly, chewy in the middle, and full of yeasty flavor.
Combine the dough ingredients in a big bowl about 21 hours before you'd like to slice and serve your pizza, let it do its thing while you go about your day, and then dump it onto the counter, shape it into balls, and stretch it out. (Or make it over the weekend and freeze the balls in separate zip-top bags for an easy dinner during the week ahead.) If you have the time and energy to plan ahead, it makes for one delicious, pillowy reward.
Overnight Pizza Dough, Step by Step
Time needed: 21 hours
Before you get started, grab a large bowl with a lid, a dough whisk or wooden/silicone mixing spoon, and a set of measuring cups and spoons.
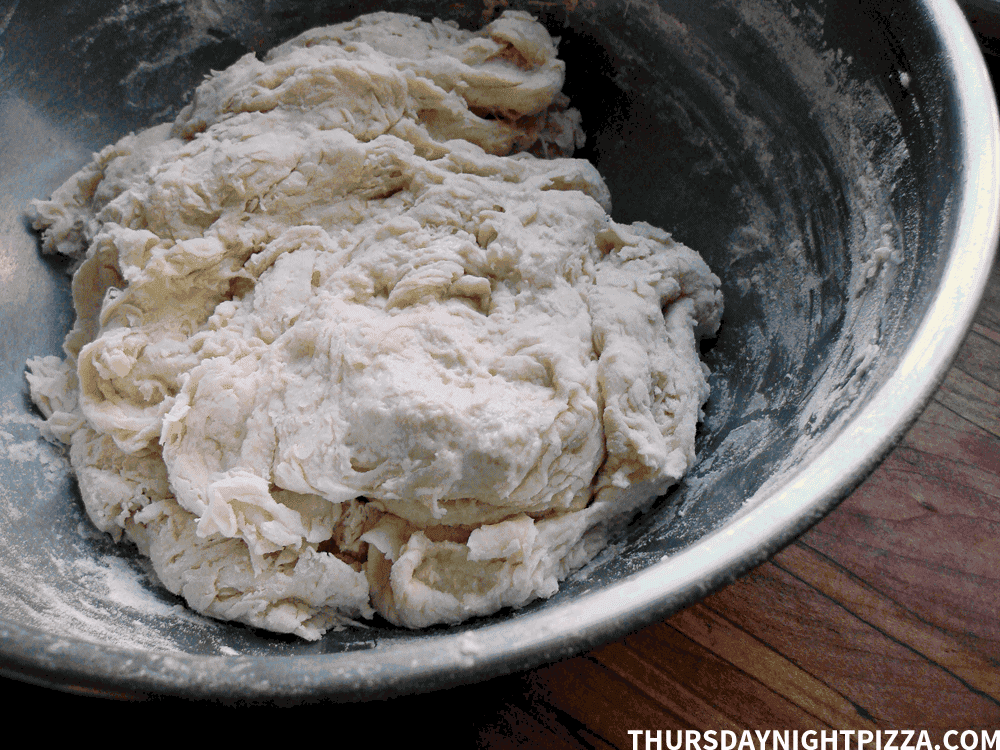
- Mix the dough.
First, measure the flour, yeast, salt, and sugar into the large bowl. Stir well, and add the water and olive oil. Mix with a dough whisk or wooden/silicone spoon until the dough comes together, then use your hands to knead the rest of the flour into the dough.

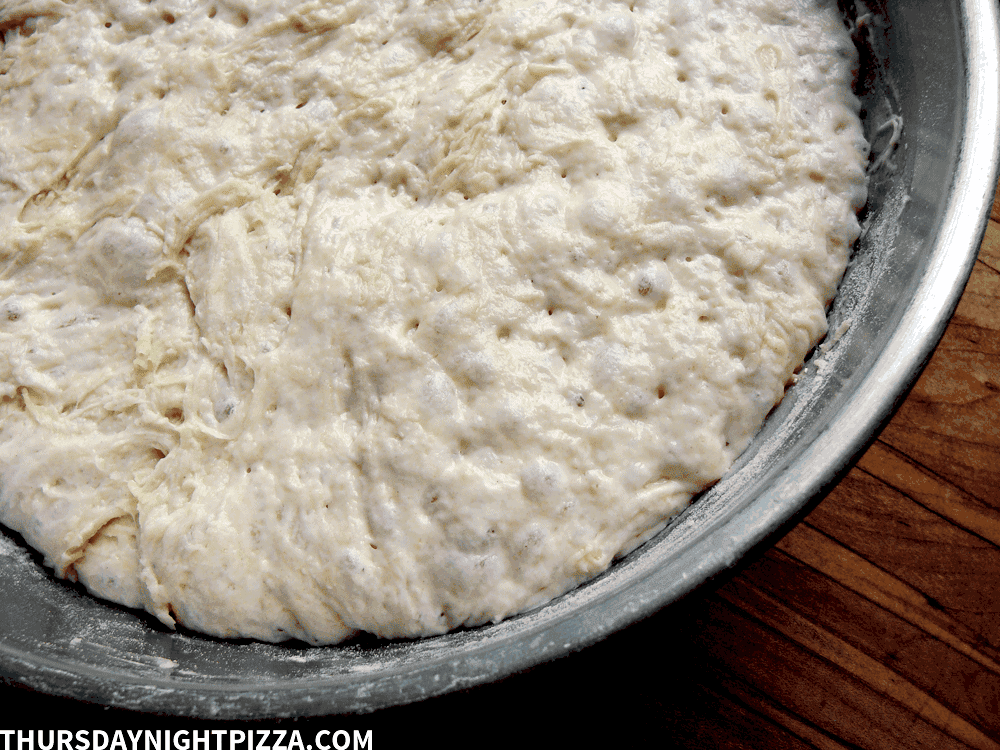
- Let it ferment.
Seal the bowl tightly with the lid (or plastic wrap) and let the dough sit at room temperature for 18 to 20 hours, until it's bubbly and about double the original volume.
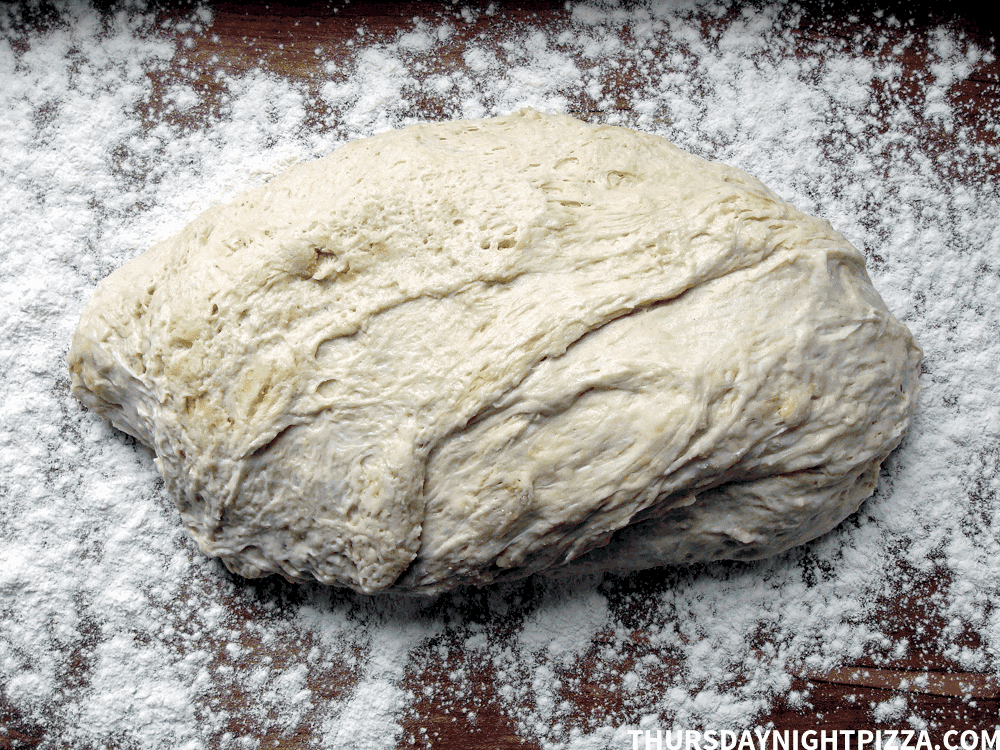
- Divide the overnight pizza dough into portions.
Dust your counter or a large cutting board generously with flour. Use a rubber/silicone spatula or your hands to scrape the dough onto the prepared surface. It will be really sticky. Turn the dough in the flour so it's easier to handle, then form it into a log and use a bench scraper or knife to divide it half (to make two 12- to 14-inch pizzas) or in more pieces to make smaller pizzas.
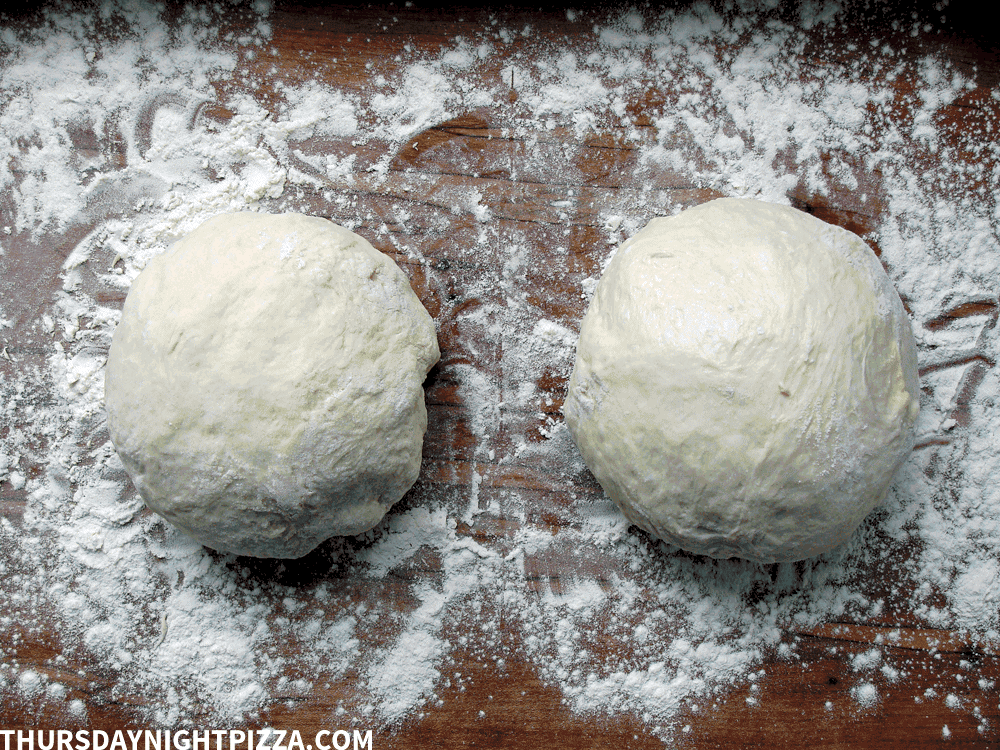
- Ball it up.
Roll each portion of dough in the flour, and form it into a ball by stretching the edges underneath and sealing them together with your fist.
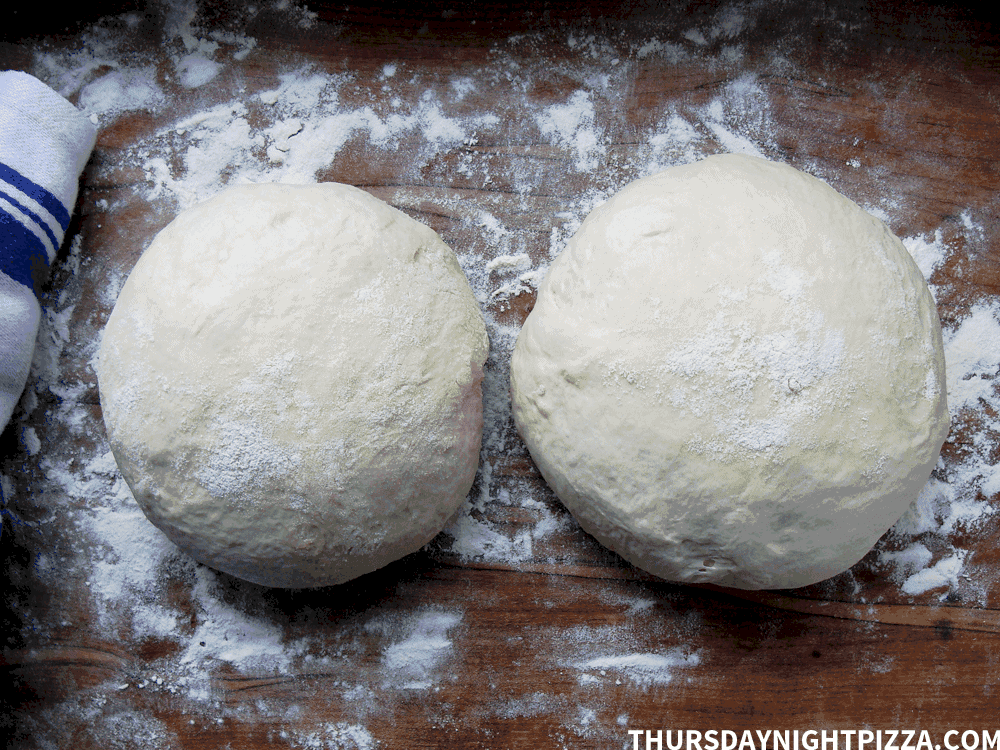
- Let the dough balls rest.
Place the formed dough balls on the floured surface and cover them with an upside-down bowl. Let them rest for 30 minutes to 2 hours. This allows them to puff up and relax for optimal stretchability. While the dough balls rest, preheat your oven.
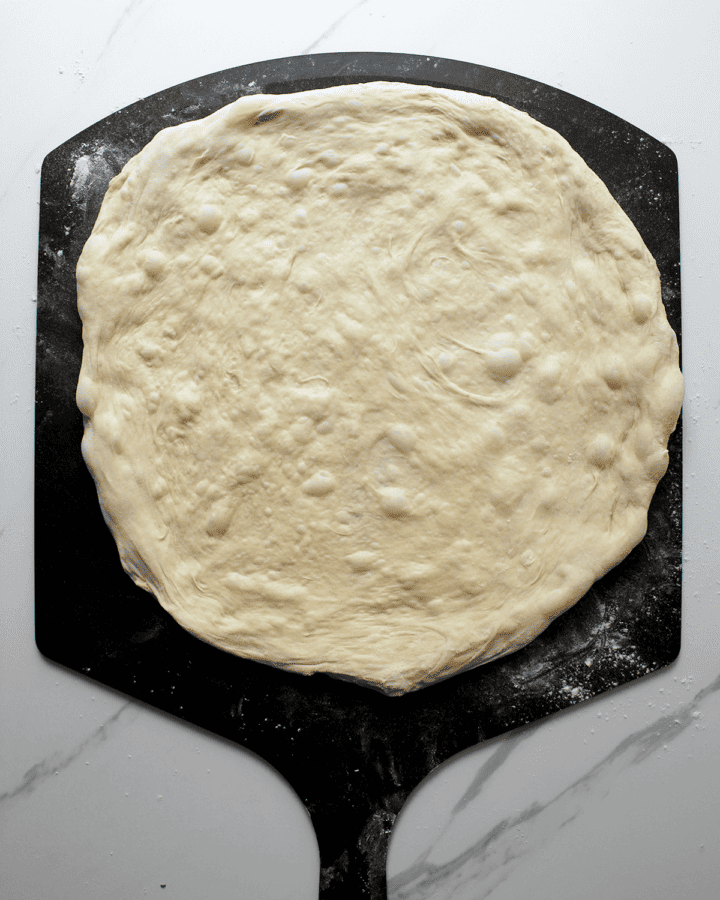
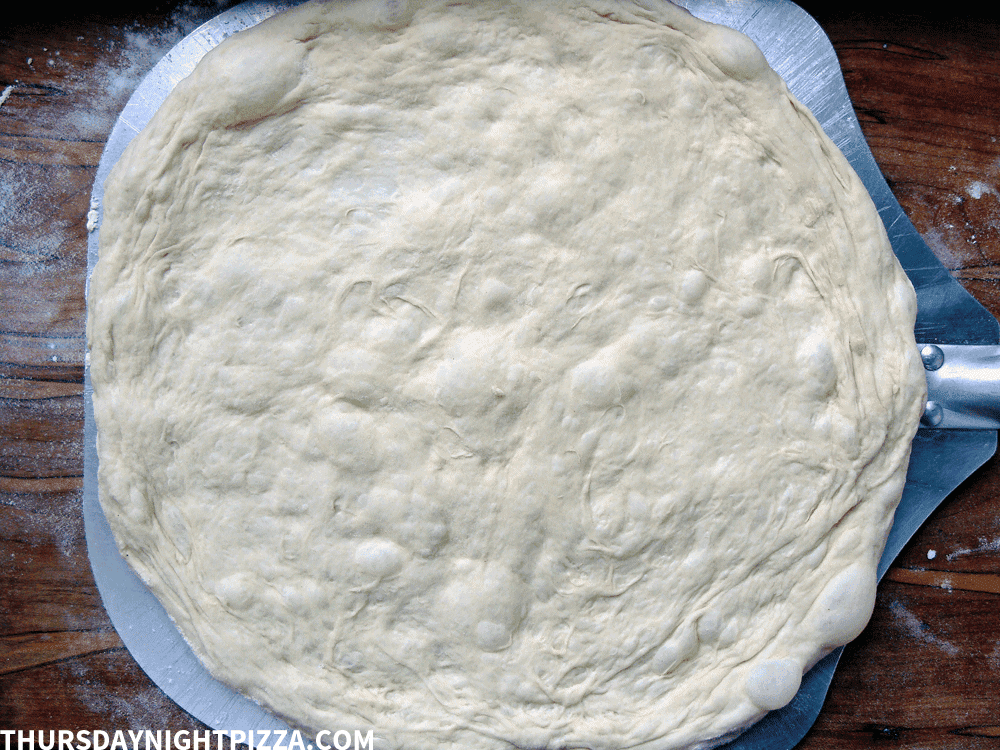
- Stretch out the dough.
Take one dough ball out from under the bowl. Pat it out to a 6- or 8-inch circle and gradually stretch it out to your desired size. Lay the dough on a prepared baking sheet or pizza peel, top, and bake.
Recipe FAQs
Yes! If you can't find (or don't want to buy) instant yeast, use the same amount of active dry yeast. They can be used interchangeably, though if you use active dry yeast, the dough might take a little longer to get bubbly and double in size.
I love this dough because it's tender and airy, yet sturdy enough for just about any combo of toppings. Be creative!
With ease! Seriously: If you've had trouble stretching dough in the past, give this one a try. Start by patting it out into a thin circle. Then, pick it up and stretch it gently in all directions, holding it by the edge and rotating it like a steering wheel. Next, lay it on your two fists and slowly move your hands away from each other. Rotate the dough after each stretch until it reaches your desired size. Check out this video for more detailed instructions.

Slow-Rise Pizza Dough
Equipment
- Large bowl with lid
- Sturdy wooden spoon or dough whisk
- Measuring cups and spoons
Ingredients
- 3¾ cups bread flour, dipped and leveled (544 grams)
- ¼ teaspoon instant (rapid-rise) yeast
- 2½ teaspoons fine sea salt
- 1 teaspoon sugar
- 1½ cups cool water
- 1 tablespoon extra-virgin olive oil
Instructions
To make the dough
- In a large bowl, whisk together the flour, yeast, salt, and sugar. Add the water and oil and mix with your hands or a wooden spoon until all of the flour is incorporated. The dough will be sticky. Cover the bowl with plastic wrap and let it rise at room temperature for 18 to 20 hours or until it has more than doubled in volume.
- Scrape the dough out onto a floured work surface and use a knife or scraper to divide it in half*. Shape each piece of dough by folding its four sides under toward the center, then forming it into a ball. If the dough feels sticky, dust it with flour.
- Cover the formed dough balls with an inverted bowl and let them rest for 30 minutes or up to 2 hours before using. (Or, if you’re not making pizza right away, place the balls in separate zip-top bags or airtight containers and store them in the refrigerator for up to 3 days or in the freezer for up to 3 months. Just make sure you bring the dough back to room temperature before stretching and topping.)
To bake the pizza
- Preheat the oven to 500°F (if using a baking sheet) or as high as it will go (if using a baking stone/steel; place the stone in the top third or place the steel in the bottom third of the oven before you start preheating). Let the oven preheat for at least 30 minutes. Then, if you’re using a baking stone or steel, switch the oven to Broil on high.
- Stretch or roll out your dough to a 12- to 14-inch circle, then transfer it to a baking sheet / pizza pan or a lightly floured pizza peel (if using a baking stone/steel).
- Prick the dough with a fork (to prevent too many bubbles from forming in the oven), brush the edges with a little olive oil, and add your sauce and toppings.
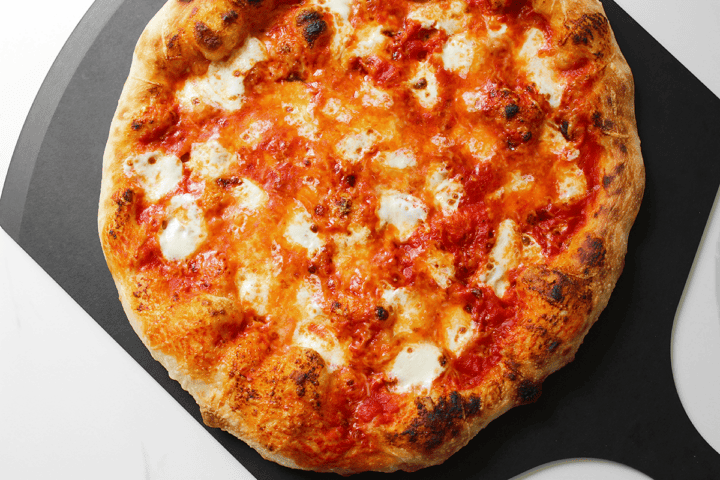
- Transfer the pizza to the oven and bake, rotating it a few times, until the crust is evenly browned on the bottom and the cheese / toppings have charred in spots—8 to 10 minutes on the baking sheet, 5 to 8 minutes on the baking stone/steel.
- Remove the pizza from the oven and sprinkle it with chopped fresh herbs or any other desired seasonings. Slice and serve!
Video
Notes
- If you’re planning to make focaccia or one large, thick-crust baking sheet pizza, simply stretch the dough to fit a heavy-duty, rimmed baking sheet/half sheet pan.
- If you want to make four 10- to 12-inch pizzas, divide the dough into four balls instead of two.
- Note: This dough is a great one to learn to stretch with. For detailed instructions, check out my pizza-dough-stretching video on YouTube.
Looking for more pizza dough recipes? Here are some of my other go-to recipes:
Tegan says
I'm new to making both bread and pizza dough by hand and have had a lot more fails with pizza dough than I have with bread so far, but this is near on fool proof! It's the best tasting and textured pizza dough I have ever made and it's ridiculously easy.
Thank you for breaking my fail streak, we all enjoyed it and it will be my front and centre recipe from now on.
Peggy Paul Casella says
Wow--this made my day! My mission with this blog is to demystify the process of homemade pizza, and it's always great to hear positive feedback. Thanks for reaching out!
Tegan says
I've made it several times now (my son helps me combine the ingredients and just plays around with it until he gets bored - great kids recipe!)
We tried eating it after 1 day instead of 3 and there definitely is a difference! Not a huge one, but I believe it tastes better after a few days 🙂
I very rarely comment on anything, but honestly this recipe is almost too good to be true. I can't thank you enough for sharing it!
Peggy Paul Casella says
I'm so glad you like the dough recipe! Does your son have any wacky pizzas topping ideas he'd like me to test for him?
Tegan says
He's allergic to dairy, so his pizza's are VERY basic!
That's another reason why I started making them at home instead of buying it take-away or frozen, I know exactly what is in and on it 😀 just an added bonus that it tastes just as good as the good take-away places we used to enjoy!
Meghan H says
Hello! I have the dough made up and its rising! Curious if you can freeze this dough for later use?
Peggy Paul Casella says
Yes! It's probably too late now, but you can absolutely freeze the dough after it has risen. Just ball it up and place each ball in a separate zip-top bag or other freezer-safe container. I'll actually be publishing a post all about freezing dough in the next few weeks. 🙂
Meghan H says
Thank you so much! Please let me know when you post it. 🙂
bryan says
for how long and what temperature?
Peggy Paul Casella says
Hi Bryan, are you asking about the rise time? As I note in the recipe, I let it rise at room temperature in a covered bowl for 18 to 20 hours.
Liz says
The recipe says “Bake” . No oven temp, no baking time. I’m with Bryan on this. It’s not a complete recipe without time and temperature.
Pascuale Poggy says
Really by far the best pizza dough i have prepare and cook and is awesome.
I did mine with garlic powder and oregano in the dough,
I have tried several recipes in my life time, but this one is the one i been looking for...!!!!!!!
This recipe stays at the front page now.
Peggy Paul Casella says
I'm so glad you love that dough as much as I do! 🙂
Hailey says
Would you make any changes for high altitudes?
Peggy Paul Casella says
Unfortunately, I don't have experience cooking at high altitudes, but thanks for bringing this up. I'll do some research and get something up on the blog ASAP. In the meantime, check out these handy guidelines by King Arthur Flour: https://www.kingarthurflour.com/learn/resources/high-altitude-baking
Mark Wilson says
Absolutely bloody amazing I have now found the best pizza base thanks it was fun to make and even more fun to devour!!!!
Peggy Paul Casella says
This makes me so happy. I'm thrilled that you like the recipe!
Maria says
Great recipe. I’ve been testing a bunch of pizza dough recipe from the internet; it’s like a chase for the holy grail for those who really love good quality pizza. I made this dough as well as your Naples dough recipe and my husband and kids preferred this one. Thank you for sharing!
Peggy Paul Casella says
I'm so glad you like the recipe!
Gail says
Bakw for how long snd at what temperature? Others have also asked.
Peggy Paul Casella says
Bake according to any pizza recipe. If you're baking the pizza on a baking sheet, let your oven preheat to 500°F for at least an hour, top the pizza on the baking sheet, and bake for 10 to 15 minutes or until the crust is golden around the edges and evenly browned on the bottom. If you're using a stone or steel, place the stone/steel in the bottom third of your oven, preheat to 550°F for about an hour, and then switch to Broil on high; transfer the topped pizza to the oven and broil for 5 to 8 minutes, until the crust is golden and charred in spots.
Mark Wilson says
Love this recipe 🤩 it’s so easy to make and turns out great every time.
Sue says
I followed the recipe, but the dough was extremly sticky after the rise. I needed to add quite a bit of flour in order to handleteh dough and get it into a ball and then stretch. I always weigh my flouor using the King Arthur standard of 120g per cup.I wondered if the scooped and leveled 3.75 cups of flour is actually a lot more than 450g. Could you please list your recipe using weights for flour - as it can vary a lot! Thanks
Jay says
I am making this for the first time. I also went down a rabbit hole researching weight vs cups of the flour. I have started to bake a lot and I really like when I get the recipe in weight, because it's so crazy how much it varies (depending on how packed your flour is, what type of flour, how you add it into the bowl (spoon it, scoop it, etc.).
And not to mention King Arthur and about 5 other brands given different cup to gram ratios. I tried measuring several different ways and the amount was very different on each. In fact, when I initially measured out by 3.75 cups doing the spoon method, I weighed the flour and I was at around 575-600 grams. I did a few experiments. I tried a few other ways and I could get it closer to around 130-155 grams per 1 cup. My conclusion was, it's just so unreliable if you use cup measurements, which is why I document every recipe now by weight only.
So to answer your question, what I did was, I weighed out 450 grams and made as per the instructions. It was WAYYY to sticky, just sticky mess. I slowly added in flour to get it to a reasonable consistency (thanks to Peggy for this recipe, great photos, very helpful to understand if we are on track). I added about 50 grams, so that puts it at around 500. It was good enough and very similar to the photos.
After about 18 hrs though, I will say that I had A LOT more holes in my raised dough than the photo. I assume maybe this means I needed more flour as it expanded too much, and if I had more flour, maybe it would look more like the photo. So when I make this again, I am going to try 550 grams to see how that works out.
I hope this helps you.
CHRISTINE WHITELONIS says
I made this dough using 525 grams KA bread four and it was dry and Crumbley initially. I came together later but did have hard dry bits in it. Next time I'll try 500 grams
Natalia Antonicelli says
I like to double the recipe, so I use 1020 grams of flour and it turns out perfect every time!
Cheryl says
544 grams is actually 4.5 cups of flour (the 3-3/4 cups stated in the recipe should be 450 grams using standard 120 g per cup) so I'm not sure how everyone else is getting a "sticky" dough without adding extra water. I had to add 1/4 - 1/3 cup more water to this much flour.
Peggy Paul Casella says
As noted in the recipe, I use dipped and leveled cups. The gram measurement is accurate based on the way I measure my cups of flour.
Mark says
Fabulous pizza base I don’t use any other recipe! Thanks
Emily says
My boyfriend and I made this dough recipe last night- I think I may have messed up the amount of water and needed to add quite a bit more of flower to get it to be less soupy. Do you know how much your dough balls each weigh? Wondering if I should split mine into three or two sections when they’re done rising?
Thanks for the help!
Peggy Paul Casella says
The recipe makes two roughly 1-pound balls. Let me know how it comes out!
Jeff B says
I've made a LOT of pizza doughs, including several overnight doughs---and this one is the BEST EVER! Thanks so much for the recipe and detailed instructions. This is my "go to" pizza dough from now on.
Rebekah says
Holy cow! This was so good! I made this for my daughter's birthday. She had a baking party and each girl got to assemble their own personal pizzas. The crust was so good I would have eaten it without any toppings! 😄 It was so flavorful and the texture was perfect; crisp on the outside, soft and moist with those perfect pockets of air on the inside. So easy to make too! I don't think I'll be eating out for pizza again!
Peggy Paul Casella says
So glad you love the recipe as much as I do!
Rebekah says
Forgot to rate the recipe when I left my review!
Natalia says
Can I double this recipe? I like to make 3 extra large pizzas!
Peggy Paul Casella says
Sure! I'd just make two batches.
Leora says
Amazing pizza dough! I was surprised that 1/4 tsp of yeast would work but it certainly did. I put one crust in a 12-inch cast iron pan preheated in a 500 degree oven on the bottom rack. I put the other on a pizza stone also preheated at 500 degrees. I think the pizza in the cast iron came out the best but both were so good! I will use this recipe again and again! It tasted so good!
Peggy Paul Casella says
So glad you love the recipe as much as I do!
Jay says
Hi Peggy - thanks again for this awesome website. I can't wait to try all your different recipes for the dough. My wife and I moved back to the US from Japan and we miss access to high quality pizza by very detailed (OCD) chefs. 😉 I guess I'm one of them. We are trying your recipe tonight, can't wait to eat it.
I wanted to just ask the question about leaving the dough out at room temperature for so long. When I google searched how long its safe to leave pizza dough out, most say no more than 2 hours or so. But then I can't see any milk or eggs in this, so I guess it woulnd't matter.
In fact, we made our dough earlier yesterday and it's been rising at room temperature for probably around 24 - 26 hrs by now. Is that okay??? I think we did the cut in halve and form two dough balls around the 22hr mark and that was about 2 hrs ago. I just noticed that the balls have doubled in size again in the glass bowl to where it was coming out from under the bowl. So I scooped them up, placed them in a glass bowl, covered with plastic wrap and put in the fridge (as we wont be able to bake the pizza for another hour or two). I assume putting in the fridge will slow down the rise. What do you recommend in this situation? And can you please confirm that there is no health risk by having the dough out so long at room temperature?
Peggy Paul Casella says
Hi Jay! The dough is totally safe fermenting at room temperature for the time indicated in the recipe. If you switch to the fridge to slow down fermentation, just make sure you let the dough come back to room temp before stretching and baking. Let me know how it goes!
Allison says
Can you use all-purpose flour or must it be specifically bread flour? I’m new to making pizza dough and breads!
Peggy Paul Casella says
You can use all-purpose flour. Let me know how it turns out!
Maxwell Powers says
Thanks for the recipe 🙂 Been fine tuning it for a while now. Different flours, slightly more olive oil, different rise times and different yeasts. I have found 115 degree water works the best. I make double batches and measure all ingredients by weight. I freeze portions in freezer zip-lock bags that I mist with olive oil spray prior to putting the dough balls in. I thaw the dough for a couple hrs ( to room temp ) prior to stretching. I have cooked this on a pizza stone in my bbq grill at 550 degrees, In my oven at 550 degrees ( about 22 mins, the thicker your dough the longer it will take ) on a pizza stone. I have also cooked this at 550 on a stainless steel pizza pan ( flat ) in my oven and on an expanded mesh pan in my oven at 550 degrees. Just about every time the pizza turned out fantastic. My only problem now is that I am spoiled, I can not order pizza ever again after going down this rabbit hole. Another tip, buy whole milk mozzarella and shred it yourself. The part skim mozzarella has less elasticity than the whole milk. It's okay in a pinch but the mouth feel of the whole milk type is a lot smoother. I won't bother to go into my home made pizza sauce madness - lol Thanks again - Max
Peggy Paul Casella says
Right?! Once you learn how to make good pizza at home, you think twice before ordering out!
Michelle Lamping says
What’s the trick to getting the pizza onto the hot stone in the oven?
Peggy Paul Casella says
Top your pizza on a pizza peel dusted lightly with flour! Check out this post to learn all about it: https://www.thursdaynightpizza.com/pizza-peels-101/
Briana Renfrow says
I would love to know how this dough would work for the Frozen Pizza Recipe. Do any adjustments need to be made? Thanks!
Peggy Paul Casella says
It works great for frozen pizza. No adjustments necessary!
Marty says
Made it today for first time. Very happy with the results. I need to work harder at stretching since my first pizza was too thick. Should have watched your stretching video before the bake. Will try again. Thanks.