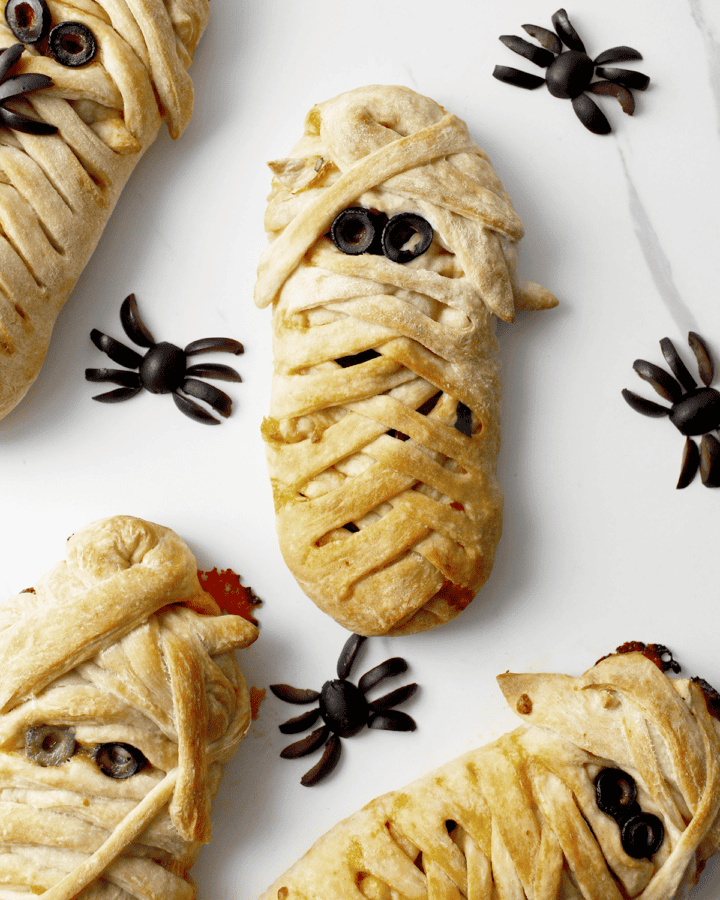
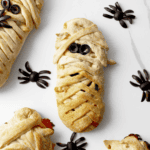
Looking for a fun, easy Halloween dinner? These individual Mummy Pizza Braids are spooky delicious and can be stuffed with all your favorite pizza toppings.
Mummy Pizza Braid Recipe Notes
Here are a few things to keep in mind before you tackle the recipe:
- For best results, use pliable dough. I made a batch of Weeknight Pizza Dough and let it rise for an extra hour (2 hours total) before dividing it into four pieces and balling them up. If you have the time or can plan ahead, Overnight Dough, New York Style, and Neapolitan are all really easy to work with and bake up lighter than my Weeknight recipe. You'll need one full recipe of dough for these mummy braids.
- Make 8 smaller pizza mummies if you have little kiddos or are serving a crowd. Each pizza braid makes one satisfying adult dinner serving. If that doesn't fit your needs, simply make 8 smaller mummies or make some large and some small. Just watch them in the oven and take them out when they're evenly browned on the top and bottom.
- Go easy on fillings. For reference, I used 2 to 3 tablespoons of sauce, ¼ to ⅓ cup shredded cheese, 8 to 11 pepperoni slices, and a couple tablespoons of other toppings for each mummy pizza braid. I also chose low-moisture fillings and cooked and blotted my mushrooms to make sure the insides didn't get soggy as they baked.
Recipe FAQ
Yes! Just let them cool to room temperature after baking, place them in an airtight container, and refrigerate for up to 3 days. Or, place the cooled mummies in zip-top bags, press out all the air, and freeze for up to 3 months. Reheat the chilled or frozen mummies in the microwave or oven when you're ready to eat.
Low-moisture mozzarella is better for this recipe because it doesn't release as much moisture when it melts. You can use fresh mozzarella if that's all you have, but it will probably seep out of the braid in the oven.
Definitely. Just do me a favor and choose a ball of premade dough, not the stuff that comes in a tube, and let it come fully to room temperature before you try to roll it out.
Want more Halloween pizza inspiration? Check out these recipes, too:
Halloween Mummy Pizza Braids
Equipment
- large rimmed baking sheet
- parchment paper
- Rolling Pin
- Sharp paring knife
- pastry brush
Ingredients
- ½ to ¾ cup super-easy marinara sauce or your favorite pizza sauce, plus more for serving
- 4 to 6 ounces low-moisture mozzarella, shredded (1 to 1½ cups)
- 2 to 4 ounces thinly sliced pepperoni (optional)
- Other pizza toppings (see note)
- 4 large pitted black olives
- 2 (14- to 16-ounce) balls pizza dough (one full recipe), at room temperature
- Extra-virgin olive oil
Instructions
- Preheat the oven to 400°F with a rack in the middle position. Line a large rimmed baking sheet with parchment paper.
- Grab a spoon for the marinara sauce, shred the mozzarella, and prep your toppings (see note). Cut two perfect slices out of each pitted black olive to make eyes (you should have four sets.) Arrange all of this on a clear work surface where you plan to assemble the pizza braids.
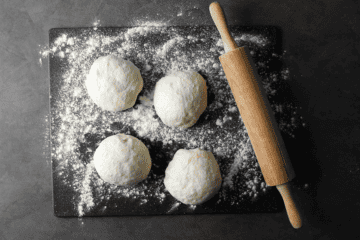
- Divide each dough ball into two equal pieces and ball them up. Place one of the balls on a large, floured cutting board. Keep the remaining three under an upside-down bowl so they don't dry out while you form the first mummy pizza braid.

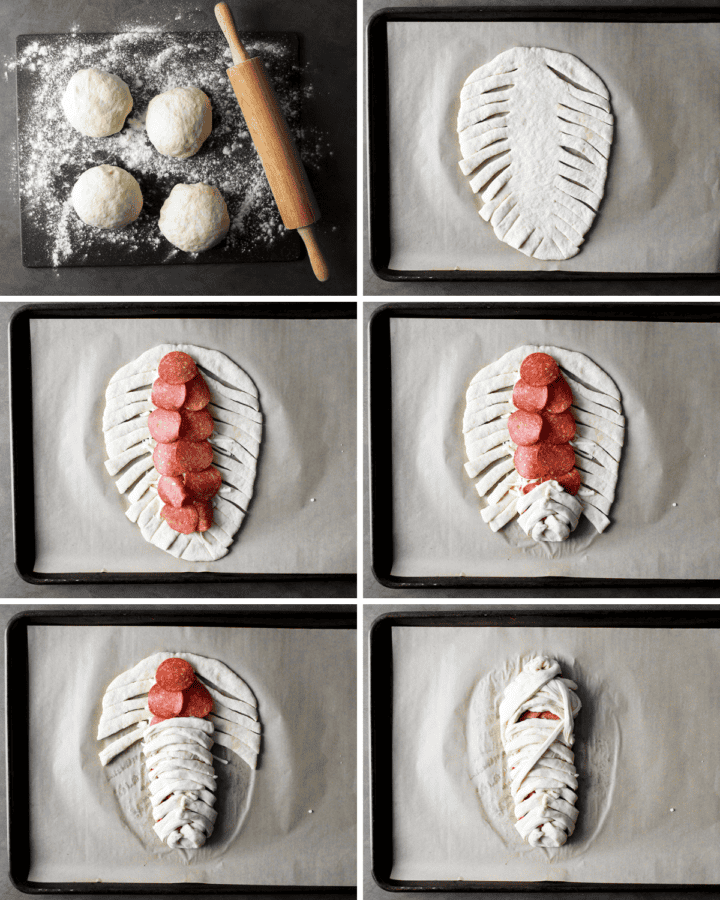
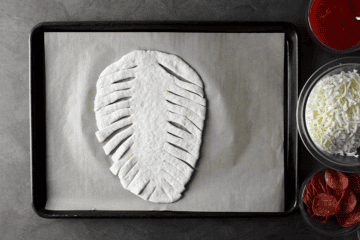
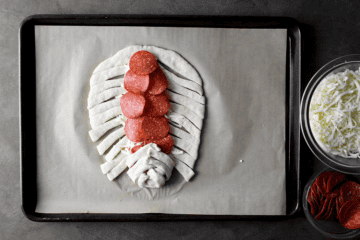
- Roll or stretch the dough into a 7-by-11-inch oval. Then, use a sharp paring knife to cut 2-inch-long, ¼- to ½-inch-thick diagonal strips into the long edges of the oval, leaving a 3-inch-wide column down the center for the fillings. (See photo.) Place the prepared dough on the parchment-lined baking sheet.
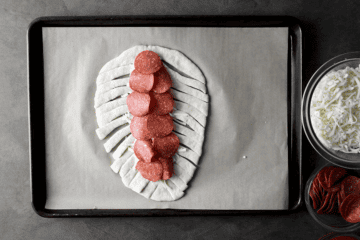
- Spread 2 to 3 tablespoons of pizza sauce down the middle of the dough, sprinkle with ¼ to ⅓ cup of the shredded mozzarella, and add sliced pepperoni and other toppings.
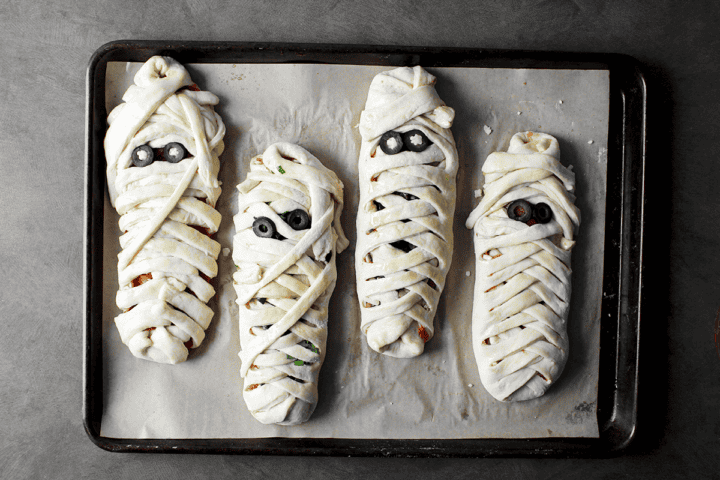
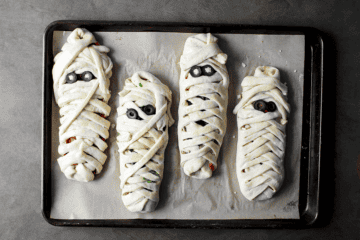
- Pull the triangle of dough up and over the toppings at the bottom of the oval. Next, working from the bottom upward, braid the strips of dough over the toppings to make a mummy wrapping, leaving a gap near the top for the eyes to peek through. Place two olive slices in the gap and press little pieces of mozzarella into the holes, if desired. (See image here and video below.)
- Repeat the rolling/stretching, topping, and wrapping steps with the remaining three balls of dough.
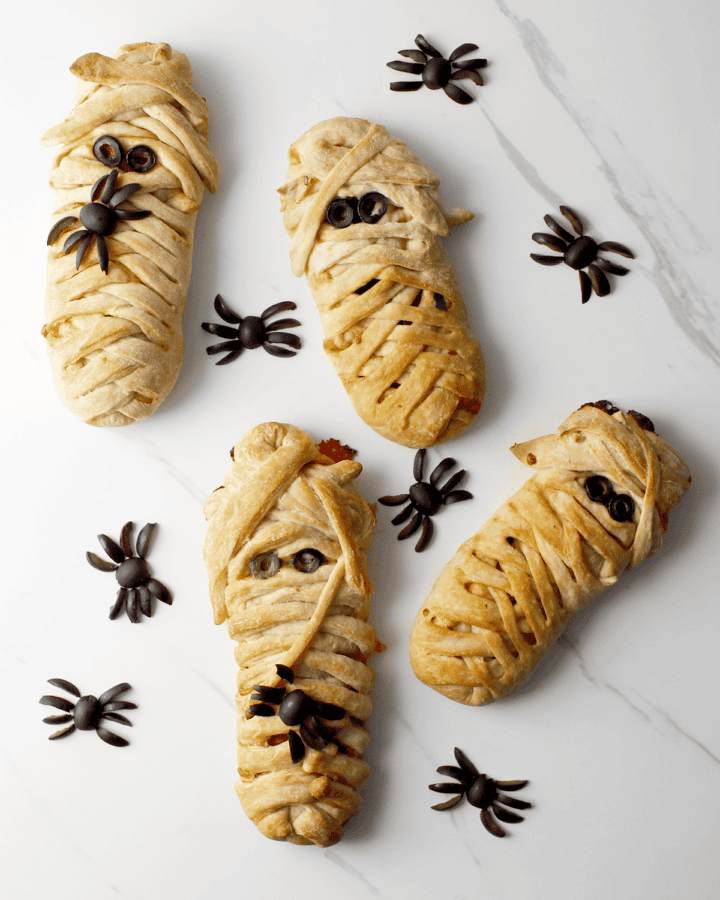
- Brush the tops of the mummy pizza braids with a little olive oil and bake for 25 to 28 minutes, rotating the pan around the halfway mark, until the tops and bottoms are evenly browned.
- Serve hot with marinara/pizza sauce for dipping.
Video
Notes
- Dough: Any "regular" (not Sicilian-style) pizza dough will work for this recipe. If you're making it yourself, try my Weeknight Pizza Dough and let it rise for 2 hours so it's extra pliable, or plan ahead and make Overnight Dough, New York-Style, or Neapolitan. If you'd rather buy premade dough, make sure you choose a bagged ball of dough and let it come to room temperature before dividing and rolling/stretching.
- Toppings: I went with thinly sliced pepperoni, sliced baby spinach, chopped black olives (since I needed them for the eyes anyway), and sauteed mushrooms (thinly sliced, cooked in a little oil just until tender, then blotted dry). Feel free to use any toppings you like, as long as they aren't too high in moisture. Remember: Your toppings will be baked INSIDE the dough, so moisture can't evaporate as easily as on a traditional open-face pizza.
- Baking: For best results, go by visual cues, not timing. You want the braids to be golden brown on the top and the bottom.
Bryan Jones says
100% making these for our Halloween party!!
Peggy Paul Casella says
YES! Let me know how it turns out!
Jess says
ANOTHER ADORABLE IDEA kids will love—thank you!! Every recipe on this site turns out perfectly when I make it at home, so no fears about that, but question: if I wanted to make these mostly or completely ahead of time for a kid’s birthday party, how would you suggest reheating them?
Peggy Paul Casella says
Thanks, Jess! You can totally make these ahead of time. Just bake according to the directions, let come to room temperature, and store in an airtight container in the refrigerator for up to 3 days. If you want to make them even further ahead, you can freeze them either before or after baking. Either way, wrap them tightly with plastic film, place them in zip-top bags, press out all the air, and freeze for up to 3 months. Reheat baked mummies on a baking sheet at 375 or 400°F just until they're hot. Bake frozen, uncooked mummies according to the instructions in this recipe--just add more time and bake until the top and bottom are evenly browned.
Sarah says
I made these for my kids last night and they were a HIT!!! I used the weeknight dough recipe and it was perfectly ready after 2 hours. We didn't have any olives but pickles worked great as creepy eyes. My girls literally squealed with joy when they came out of the oven and demanded I make them again for Halloween. Such a great recipe!
Peggy Paul Casella says
SO glad you liked them, Sarah! Pickles are a great idea!
Cimon says
Made these yesterday with the weeknight dough recipe. I followed the instruction as is and it came out perfect ! It was delicious and i will definitly make again !
Peggy Paul Casella says
Yay! Happy Pizzaween!