Just bought an outdoor oven, or thinking about building your own? In this article and video, I'll show you how to use a pizza oven, whether it's wood/charcoal-fired or propane, store-bought or DIY.
Full disclosure: I am an Ooni ambassador, and I get a small commission if you purchase items using the affiliate links in this post. That being said, however, all of the opinions in this post are my own, and the instructions and recommendations apply to any outdoor pizza oven you can buy or make yourself.
Create an Outdoor Pizza Kitchen
Before you fire up your pizza oven, make sure you're set up for success (and safety).
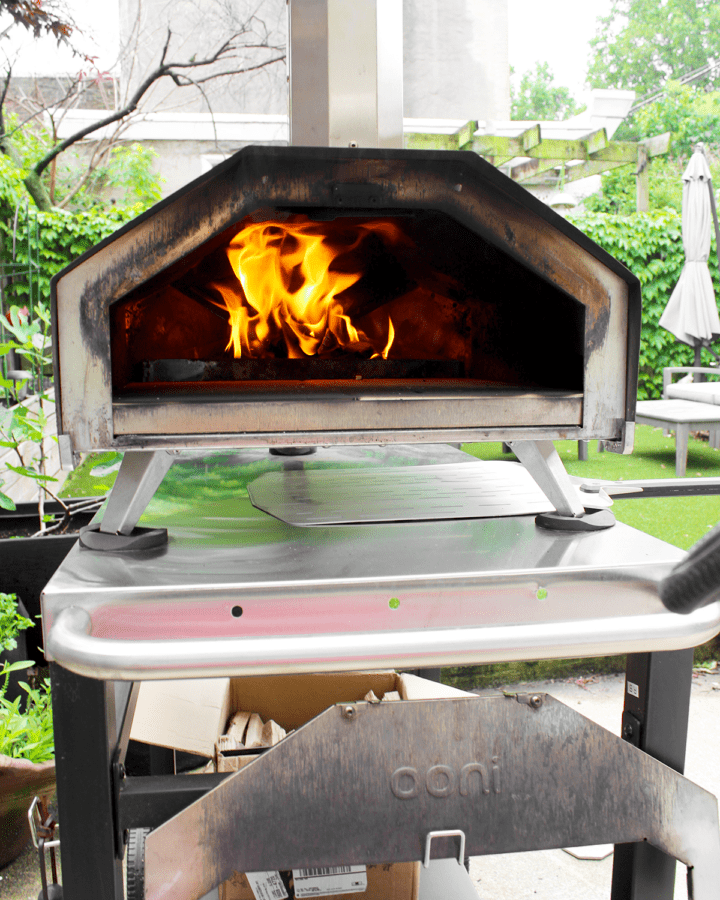
First, find a sturdy, heatproof surface for your outdoor oven. If your oven doesn't come with it's own cart or stand, get the exact measurements online (or take them yourself), then build or purchase an outdoor table that is slightly bigger than the pizza oven and tall enough so you won't have to crouch down to launch and retrieve pizzas. This one's perfect for my small backyard*, but I also love Ooni's modular tables, which clip together so your prep space can be right next to the oven**.
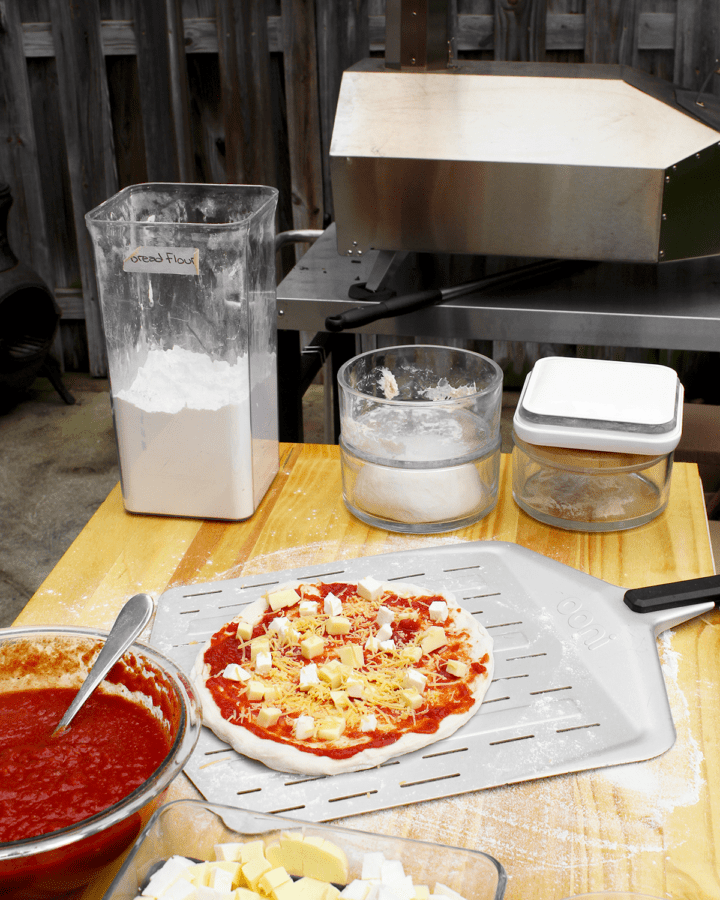
And that brings me to the second most important part of your outdoor pizza kitchen setup. Where will you stretch and top your dough? Your prep station can be as utilitarian or fancy as you like (mine is two sawhorses* with a jumbo cutting board on top). Just make sure it's close to your oven so you don't get frazzled. Many home pizza ovens can get up to 1,000 degrees and cook pizzas in a minute or less, which means you've got to work quickly. Invest in a bar-height table like this one* or the modular tables I mentioned above, or build the outdoor kitchen of your (and my) dreams (and then share a photo so I can live vicariously through you).
Essential and Nice-to-Have Equipment
Once you have a sturdy, safe place for your pizza oven to sit and a surface for stretching and topping the pizza dough, it's time to gather your pizza-making tools. Here are the basic must-haves, with some useful extras woven in:
- Infrared thermometer for measuring the pizza oven's temperature. The most common reason new pizza oven owners fail at their first attempts is that the baking surface in their ovens aren't hot enough. You want your oven to reach a consistent temperature somewhere between 700°F and 1,000°F before you bake any pizzas. And the best way to safely check the oven's temperature is with an infrared thermometer like this one*.
- Pizza peel for sliding the topped dough into the hot oven. It doesn't matter how great your homemade dough is or how creative your toppings might be if you have no way to transport them into your hot oven. If you have the space, get a wooden or metal peel* for launching and a smaller round turning peel** for rotating the pizza while it cooks and retrieving it from the oven. Or, if you only have space for one peel, stick with one long-handled metal peel. (I love my perforated metal peel**, which is super light and keeps the dough from sticking when I transfer pizzas into the oven.)
- Long-handled offset spatula for keeping the dough from sticking to the peel. Even the most seasoned pizza chefs struggle with launching their topped dough into the oven sometimes. If the dough begins to stick to your peel when you're adding toppings, dip a long offset spatula in flour and slide it between the dough and the peel all the way around until the dough moves freely.
- Heavy duty heat-resistant (fire-proof) gloves to protect your hands and forearms. Just like Grandpa always said, "If you play with fire, you're gonna get burned." Some pizza ovens come with fire-proof gloves; if yours didn't, buy yourself a pair like these* BEFORE you fire up your oven for the first time.
- Long-handled oven brush/scraper for cleaning ash and burnt toppings off the baking stone. Technically, this is an optional piece of equipment. However, if you're using a wood- and/or charcoal-fired oven, you might want something to help you clean ash off the stone between pizzas.
How to Make Pizza in an Outdoor Pizza Oven
OK. Now you're ready to make some pizza! Here are the basic steps for firing up and using your pizza oven. (Check out the video above to see the whole process from start to finish.)
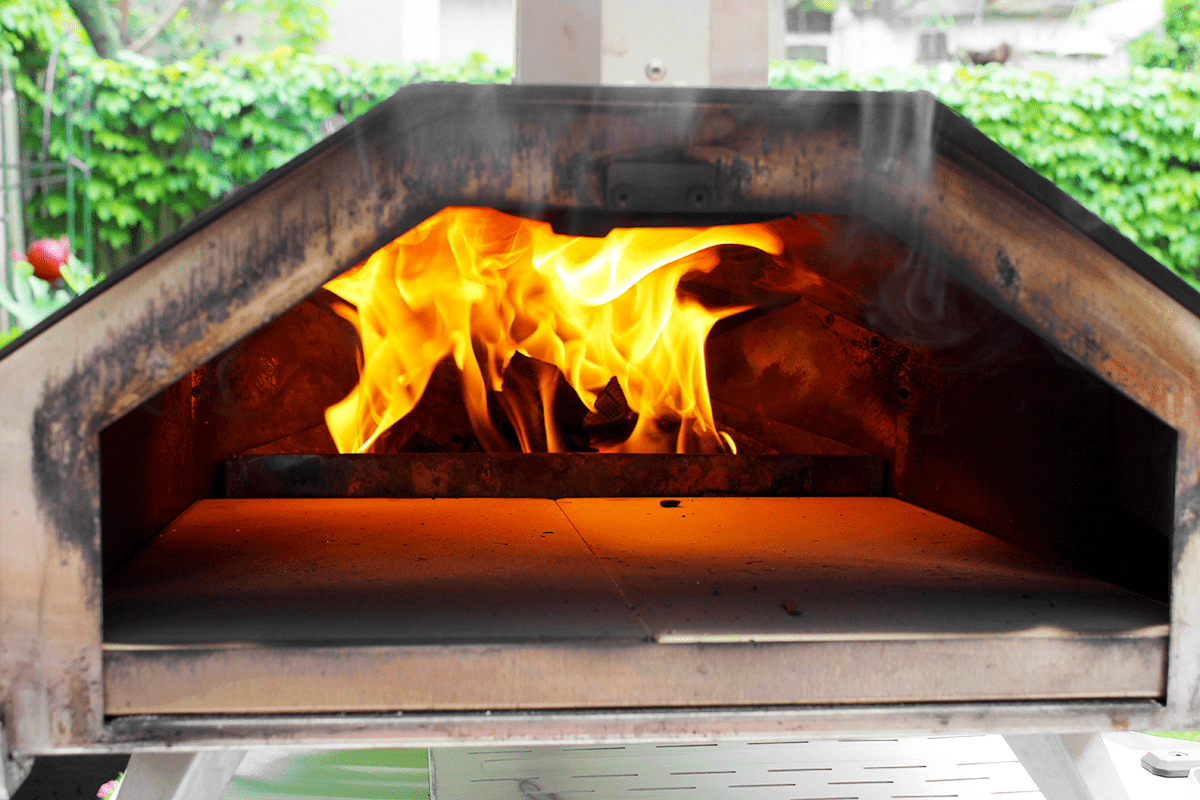
- Fire up the oven.
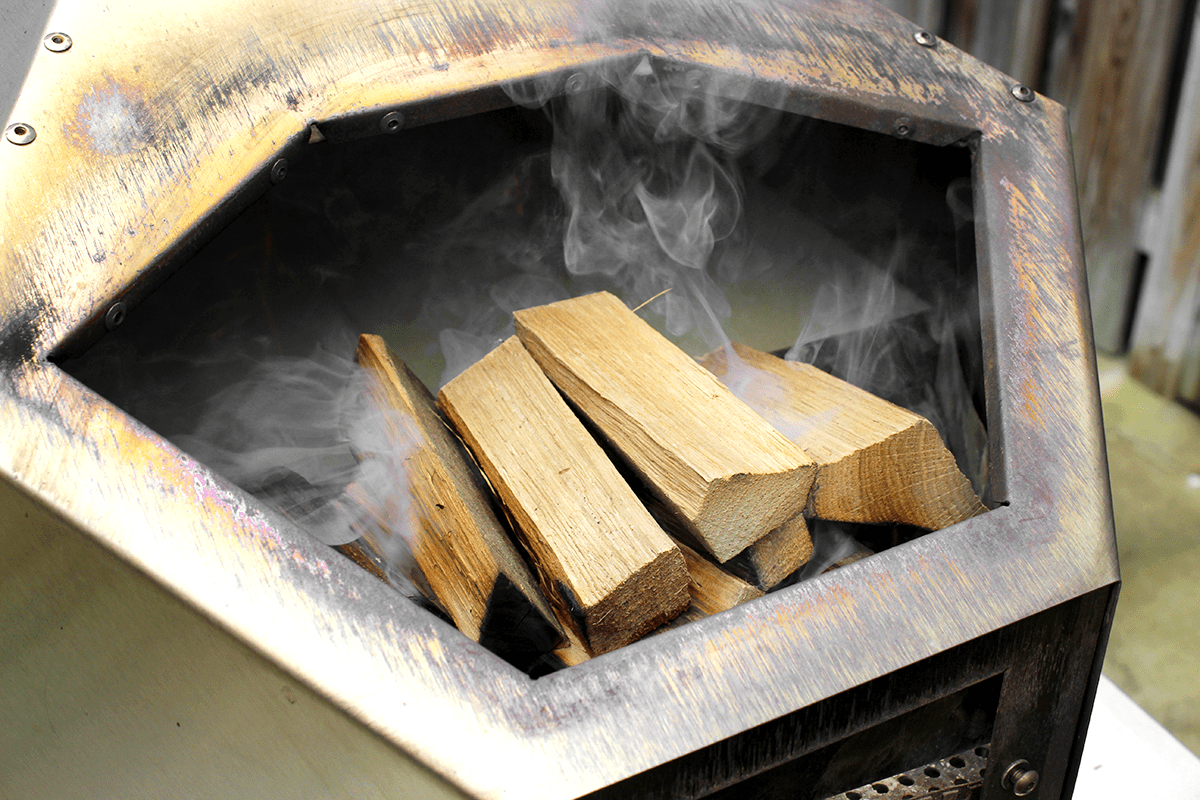
Light your pizza oven according to the manufacturer’s directions. This might mean building a fire in an allotted area of your oven or simply turning on and igniting the propane. (In my Ooni Pro**, I pile a small mound of wood on top of a couple natural fire starters, then light the starters and close the hatch.)

- Test the oven temperature.
Let the pizza oven heat up until the stone measures somewhere between 700°F and 1,000°F on an infrared thermometer (this could take anywhere from 15 to 30 minutes, depending on the model and whether you’re using propane or a wood fire).
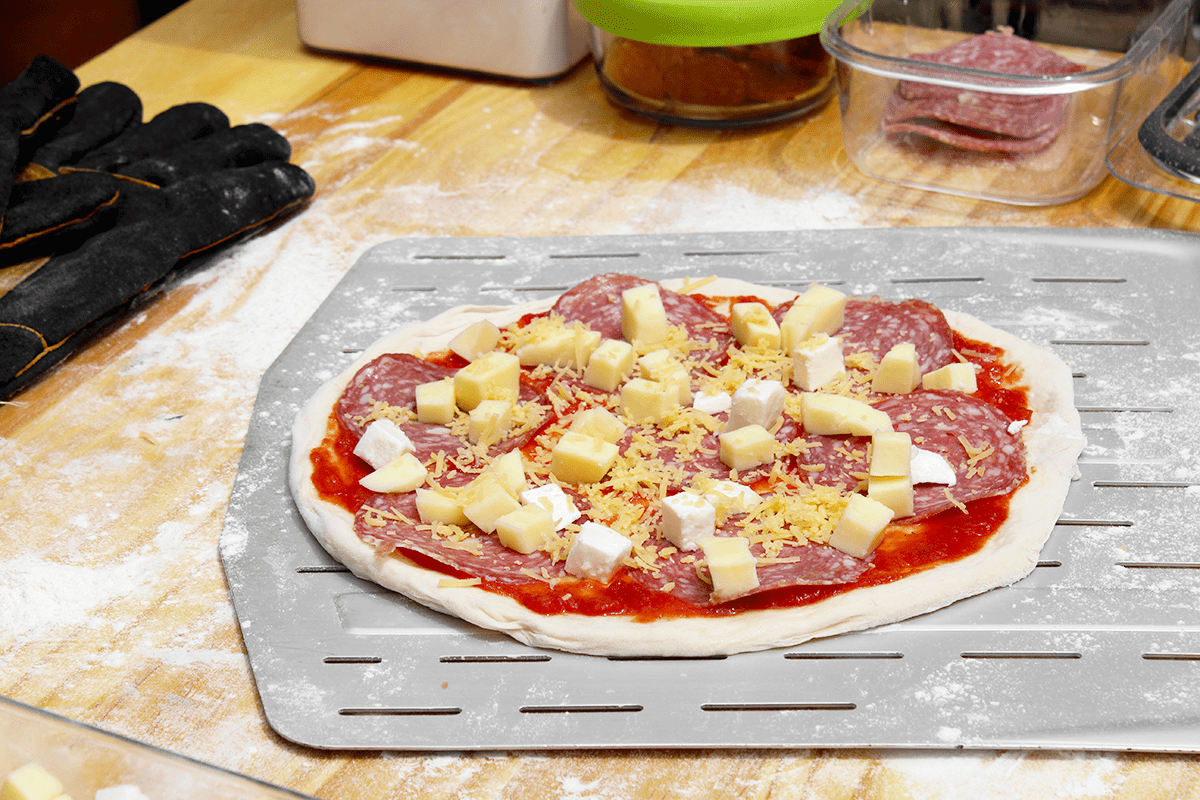
- Stretch out and top your pizza dough.
Prep all of your toppings and place them within arm’s reach wherever you’ll be assembling your pizza. (My Neapolitan and Overnight pizza doughs work really well in outdoor pizza ovens, and my go-to sauce is this no-cook marinara.)
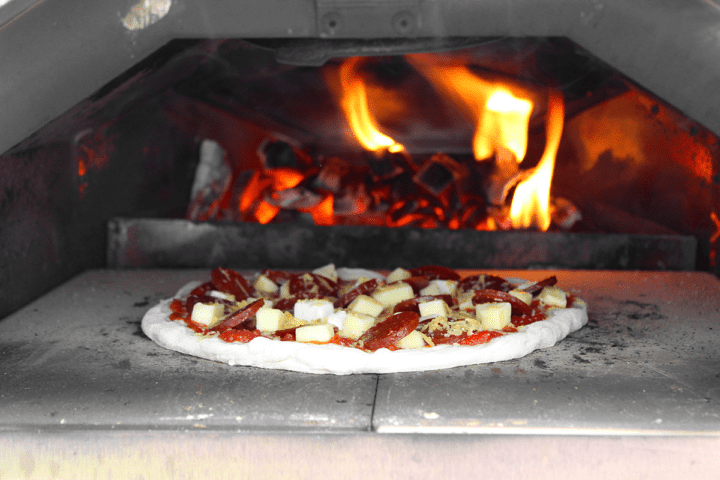
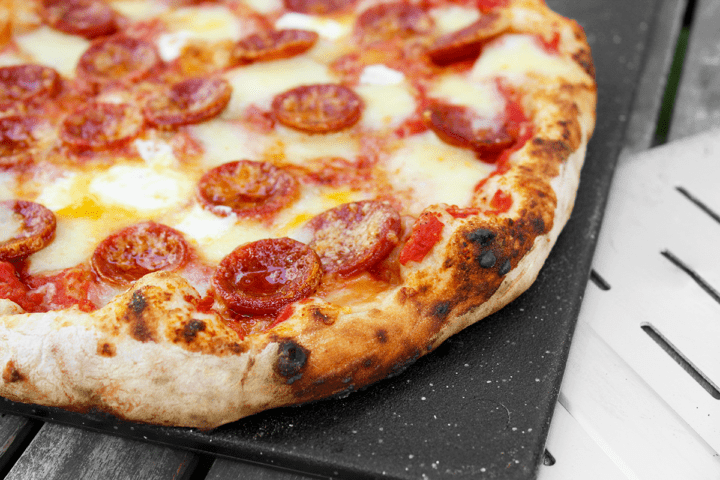
Once the oven reaches your desired temperature, stretch or roll out a ball of dough to a 12- to 14-inch round. If your dough is too thick, it will burn on the outside before it cooks all the way through, so make sure you stretch or roll it out as evenly as possible; it should be thin enough to see light through it.
Place the dough on a lightly floured pizza peel and add sauce, cheese, and other toppings, resisting the urge to overload the dough and shimmying the peel periodically to make sure the dough doesn’t stick. Start with two or three spoonfuls of sauce and spread it in a thin, even layer so you can still see glimpses of raw dough here and there. As for cheese, 4 ounces is more than enough for a 12- to 14-inch pizza; shred it or cut it into small (¼-inch) cubes so it will melt quickly. - Transfer the topped dough to the hot pizza oven.
If the dough doesn’t slide around when you jerk the peel back and forth, dust a long offset spatula with flour and slide it back and forth between the dough and the peel until the dough moves freely. Trust me on this one: don’t wait until you’re standing in front of a 1,000°F oven to test your pizza’s launchability—especially if you have spectators.
When your dough is topped and you're 100% sure it can move freely on the peel, put on those fire-proof gloves, open the oven door, and bring the topped dough to the oven. Use a quick, forward-and-back jerking motion to slide the topped dough from the peel onto the hot oven.
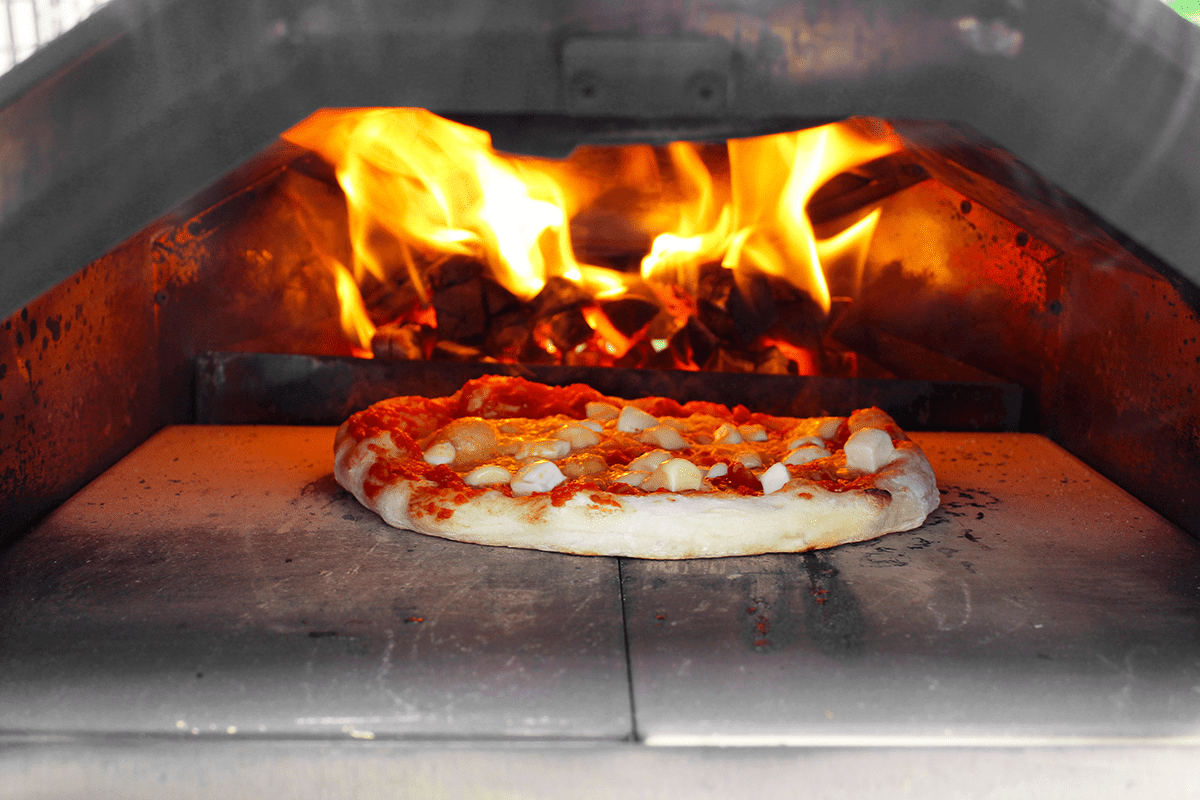
- Bake until the crust is evenly browned.
Cook the pizza, turning it every 10 to 20 seconds, until it's evenly browned on the bottom and charred in spots on top and around the edges (this could take anywhere from 1 to 6 minutes, depending on the model you’re using). If you have a turning peel, obviously use that to rotate the pizza during baking. If you don't have a turning peel, quickly take the pizza out of the oven with your regular peel, rotate it, and then return it to the oven.
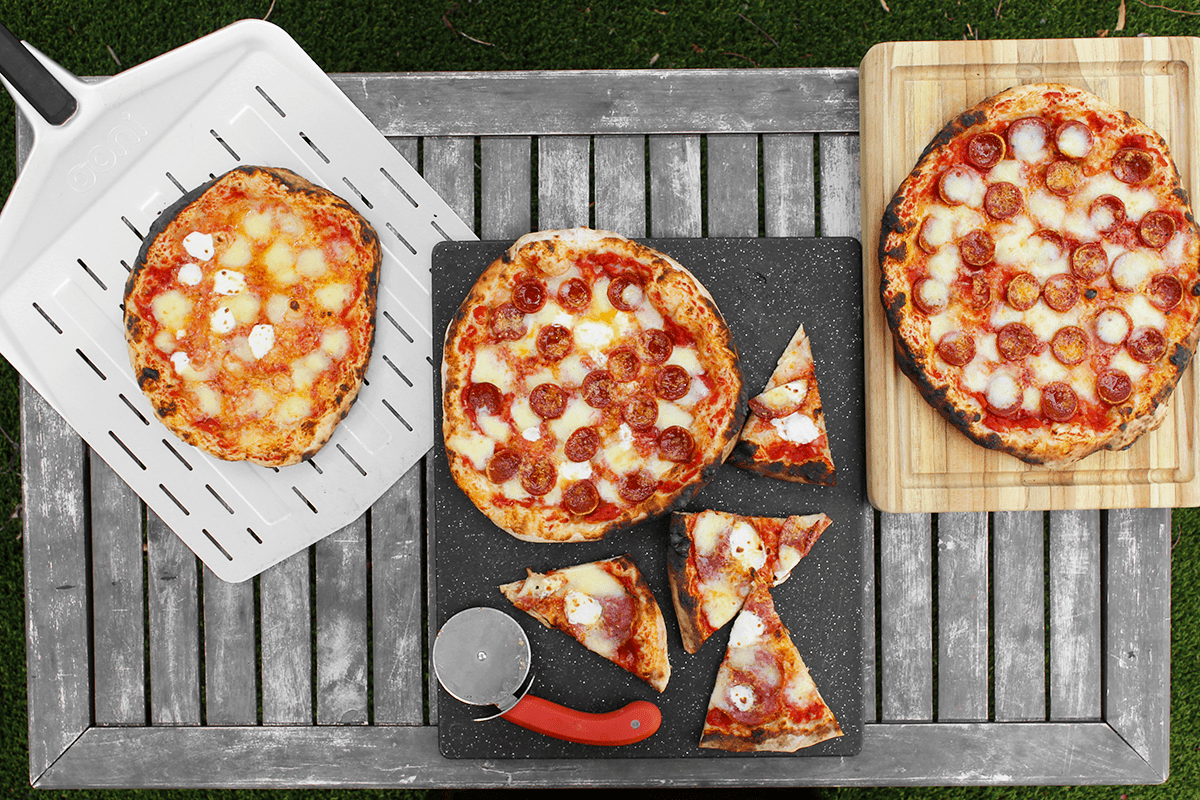
Using the peel, take the pizza out of the oven. Let it rest on a cutting board for a couple minutes before slicing and serving.
Did you find this post helpful? Still have questions about making pizza in an outdoor pizza oven? Let me know in the comments section below!
* As an Amazon Associate, I earn from qualifying purchases.
** As an Ooni associate, I get a small commission when someone purchases a product using the links in this post. However, I only recommend products I can vouch for myself and that I believe will benefit my readers.
Bryan Jones says
I learned about Ooni through your site last year, and finally bit the bullet a few months ago. Can't express how much I love this product. It is simple to set up and use, and this video has helped shed light on how to better shimmy the pizza onto the hot surface. I've really struggled with that, but I will try your technique. Can you share a link for the pizza peel you used when removing the pie from the oven? Thanks for the video!
Peggy Paul Casella says
Hi Bryan. Thanks for the comment! This is the turning peel I use, from Ooni (affiliate link).
Leslie says
When cooking the “dressed” pizza, how do you get the center of the dough done without burning the edges?
Peggy Paul Casella says
If the edges of the crust burn before the center of the dough is cooked, my guess is that you are not stretching out your dough thinly enough. If that is not the problem, try reducing the temperature of your oven, making sure the dough is stretched out thin and evenly, and then bake the pizza for slightly longer--just until the bottom is evenly browned. Let me know ho it goes!
Almeda Eskridge says
How to keep the bottom of the pizza from burning . I have a propane one
Peggy Paul Casella says
Is the bottom burning before the top crust has browned? If so, I recommend heating the pizza oven to no more than 700°F. If the top crust is browned around the same time that the bottom burns, it could just mean that you need to rotate the pizza more frequently while it bakes.
Supriya Kutty says
So informative and so healthy. You have done a great job sharing this amazing blog. Thank you for letting us know all the information.
Peggy Paul Casella says
You're very welcome!
Silvia says
This was such a helpful post! I’ve always wondered about getting the center cooked through without burning the edges. I don’t have an Ooni since I got an ilFornino first, and it’s worked really well for me, but Ooni looks great for quick bakes. I’ve found that using a turning peel and making sure the oven is evenly heated really helps. Do you have any tips for handling softer doughs?
Peggy Paul Casella says
Thanks, Silvia. What do you mean by "softer doughs"? Are you referring to ones like Neapolitan? I find the best handling tips are to work quickly, make sure you flour the peel so it doesn't stick, and turn it often while it bakes.